


Do you have a limited space for growing orchids? No problem, try growing miniature orchids! Yes! There are some species or hybrids of orchids that are small, or how do we call it, “real cute” . They are just a few inches tall, and can be established in a small pot, in small slab of wood, in small tree fern root or in a small plastic hanging basket. Caring for miniature orchids are actually just the same as caring for standard sized orchid varieties.
Like their standard-sized counterparts, mini orchids thrive in warm, moist conditions with semi-dry roots. Just the same, they still need sufficient bright diffused light, air movement, watering, and fertilization. Miniature orchids tend to be a little more sensitive, however, and require less watering and less frequent fertilization. Miniature orchids, like their standard-variety cousins, also need to be re-potted every two years in order to remain healthy.
There are some species and hybrids of orchids that are really small in size like Ascocentrum miniatum, Bulbophyllums, miniature Dendrobiums, Phalaenopsis, Kingidium, Oncidium, Aerides, Cattleya, Cymbidium, Paphiopedilum, and Spathoglottis. Not to mention are Jewel orchids like Ludisia discolor and Macodes sanderiana. Choose plants that are healthy and are in bloom.

Amiesiella monticola – an orchid with flower bigger than the plant
They are actually easy to take care of. First of all is to choose an area in the house or in the garden where you can place them safely where they can receive sufficient light and watered regularly everyday. They can be either position near a window, in the garden or in a book shelf with artificial fluorescent lights.
Give them an appropriately sized clay or plastic pot. Choose a slightly larger container than the one your orchid currently sits in. Miniature orchids have fast-growing roots, and one of the main reasons you need to periodically repot your orchids is to provide the roots with plenty of room. The new pot only needs to be large enough to fit the roots. You do not need to choose a pot that is significantly larger to anticipate further root growth.

Phalaenopsis equestris, one of the smaller types of moth orchids
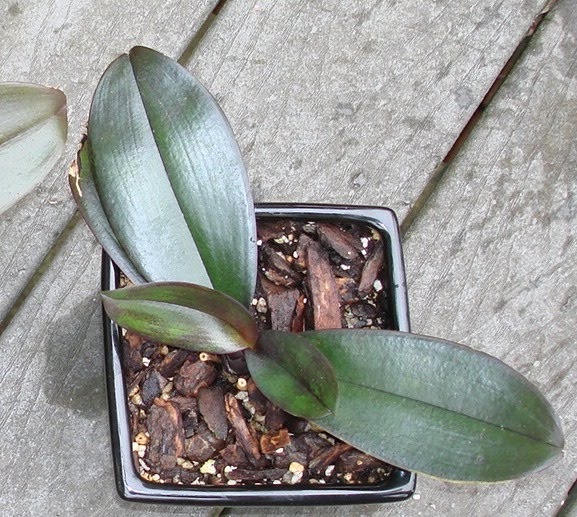
Look for a growing media that has large particles and free draining. This includes charcoal, coconut husks, broken clay pots, Pinatubo rocks, osmunda fiber, or chopped tree fern roots. In the Philippines, do not use moss as it retains too much moisture and can cause orchid roots to rot. You may also use bark or a piece of dead wood where you can attach your orchid.
For coconut husks, charcoal, osmunda fiber or choppen tree ferns, allow the growing media to be soak in water for 24 hours so that they will be drenched and absorbs water thoroughly. This is a necessity as too dried media repel water. Plant the orchid into your chosen pot firmly so that it will not move. For driftwoods or tree fern slabs, use wire or plastic twine to fasten the orchid plant into the media. This will ensure that the plant will root properly and will be established in 2 months time.
Remove old and dried inflorescence and spikes. Remove yellowing leaves and dead or dried roots. If the plant comes from an old pot or decaying wood, brush off any planting media stuck to the roots. Media breaks down as time passes, and old, decomposed media is more likely to cause your orchid’s roots to rot. As a result, you need to remove as much old media as possible and replace with new ones.
Snip away dead roots. Dead roots usually looks brown and wilted. Healthy roots, on the other hand, are white or green and relatively firm.
Scatter a little of the growing media into the bottom of your new container. You only need a little, since the miniature orchid’s roots should fill the majority of the container. The container should have enough drainage holes so that excess water will drain out.
Slowly pour the growing media around the mini orchid’s roots. Press down on the media gently to force it into the bottom and around the sides of the container. Periodically tap the side of the container to help settle it. Continue adding the media until the entire root system is covered, leaving the plant exposed from the bottom leaf up.
Seal any wound in the roots or cut stem with fungicide paste. This can be done by mixing fungicide powder with a few drops of water. Fungicide paste prevents molds from growing in the cut surface.
Refrain from watering your freshly potted orchid for the first 2-3 days. Instead, place it in a slightly shaded and warm location and mist it with a little water each day. The leaves needs to stay dry at night. The orchid plant will stay on the said pot for 2 years. It is best to Repot your mini orchids every two years. Always observe for rotting of media or roots.
After which, water the plant regularly and spray orchid foliar fertilizer once every week. If there is incidence of pest or infestation, spray with insecticide or fungicide, especially during the rainy season.
You may water your orchid by placing it in the sink or in the bath room and spraying gently with water. Place a plastic platter underneath your orchid pot to prevent excess water from dripping into furniture, especially if they are placed as decorations inside the house or office. Always check the growing media for dryness every few days. With this you can somehow assume when to water your orchid.
Allow your mini orchid to sit in a sunny spot, but avoid direct sunlight. For orchids inside the home or office, supplement artificial lighting when you cannot provide enough natural light. Fluorescent lights Place the lights 6 to 12 inches away from the top of your mini orchid to prevent accidental over-lighting.
Keep an eye on the foliage. You can usually determine whether or not your orchid receives the right amount of light based on the way its leaves look. Too little light will result in dark green leaves with no flowers. Too much light will cause the leaves to turn yellow or red. Some leaves may even develop brown “sunburn” spots. Also check regularly for presence of pests and diseases.
Maintain a room temperature between 18 and 29 degrees Celsius. Miniature orchids thrive in warm, humid conditions. For orchids inside air-conditioned rooms, place pot on a plastic tray with a lining of pebbles and water to add humidity to the plant.
Periodically mist the leaves of the mini orchid. Orchids like humid conditions, and misting the plant every day or two will mimic humidity.
Don’t be discouraged if your plants die or becomes sick. It takes time to become expert in growing miniature orchids. You need to have passion and patience, and someday, your plants will reward you with flowers.
Powered by: The Home Gardening PHThe Home Gardening PH

Harbest Agribusiness Corporation

Visit The Philippine Orchid Society Facebook Page

